Travel Lap Pillow

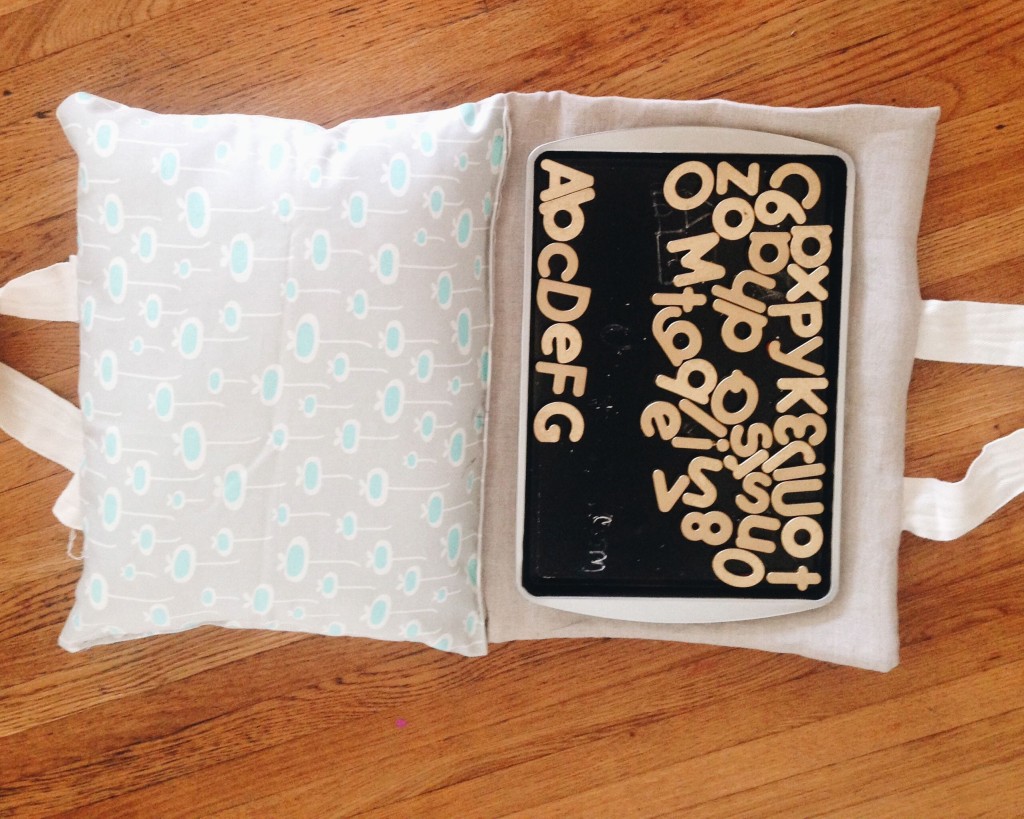
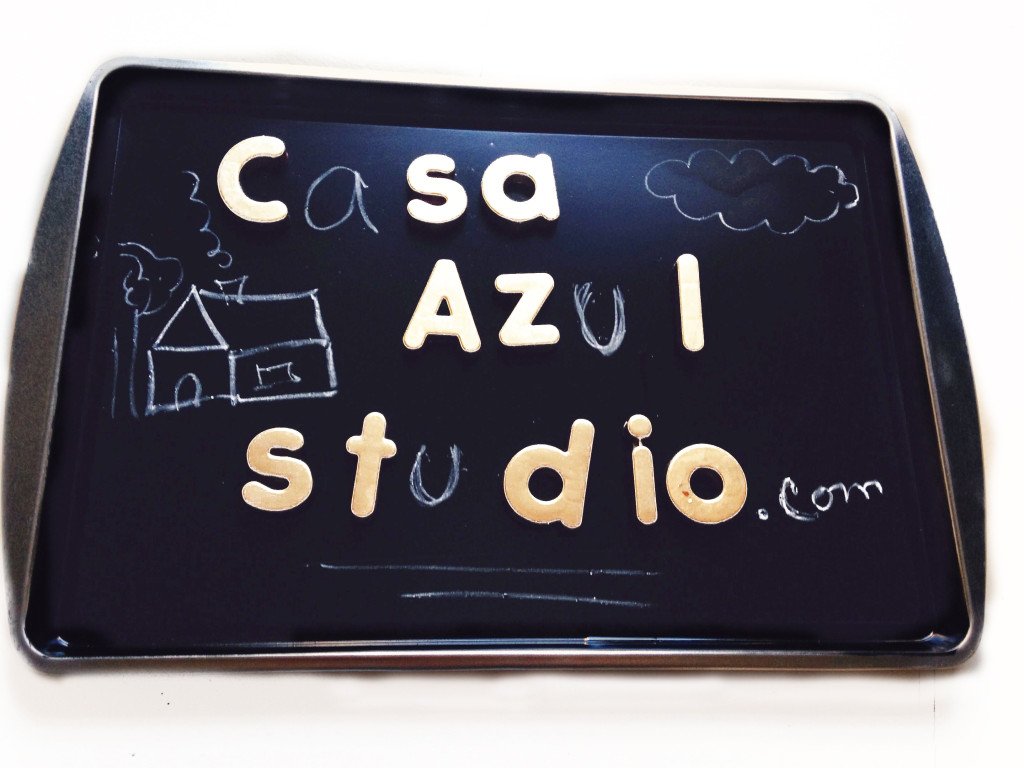
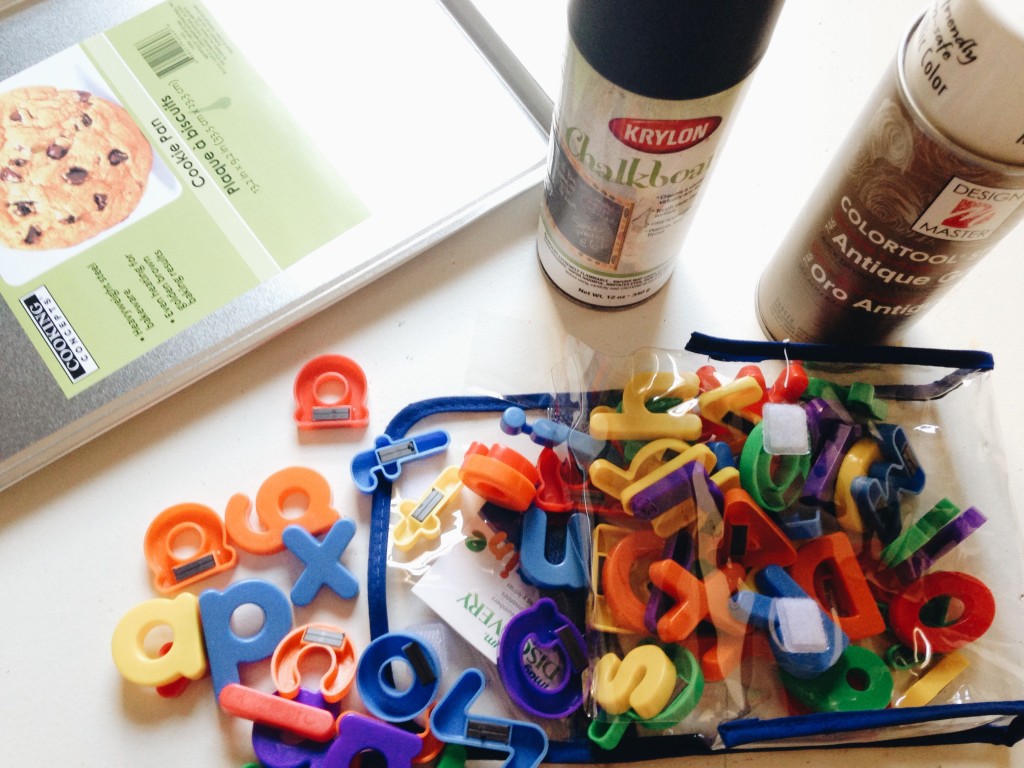
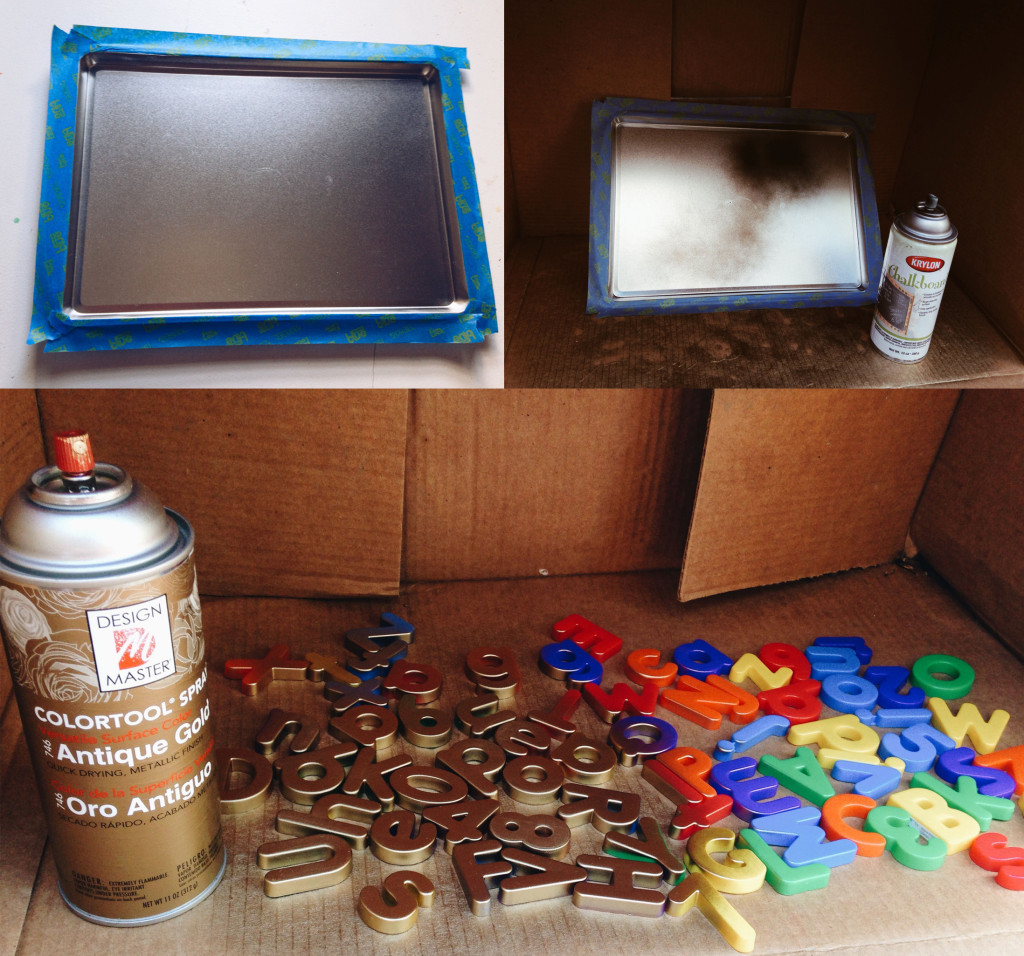
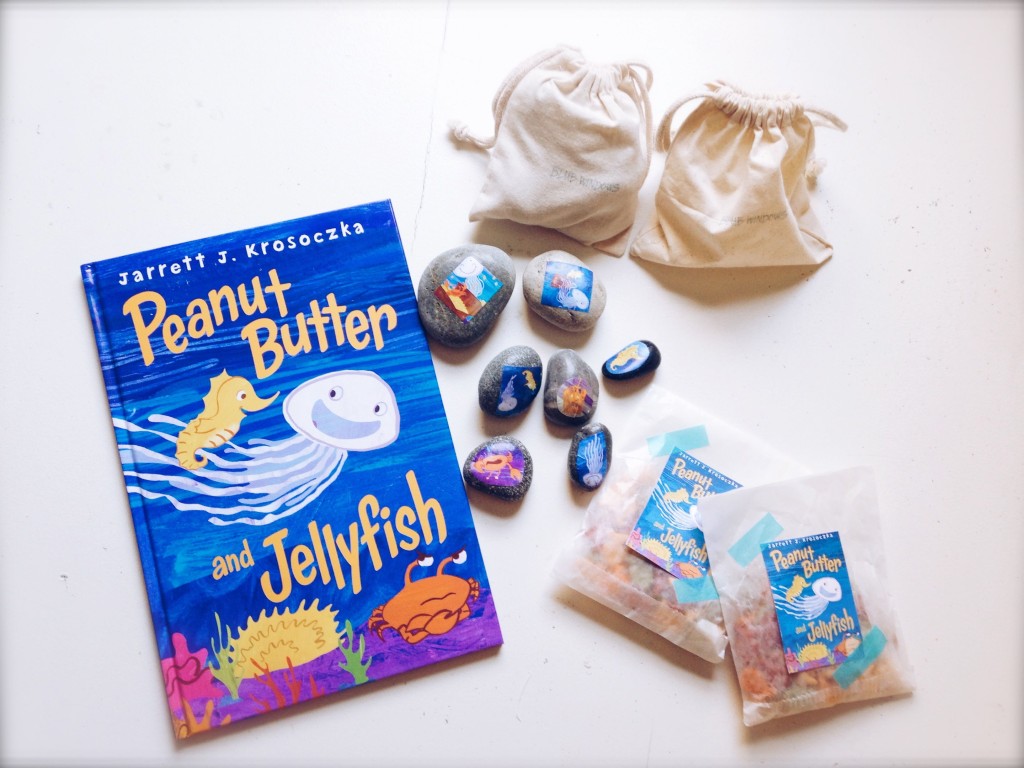
Last night while looking for ideas to take on the plane for my 4 year old, I found this awesome tutorial from Prudent Baby. Last week we made the chalkboard with the alphabet letters and finding this was just perfect for our previous project.
So this morning I went to my little studio  to find any scrap fabric to make this awesome travel pillow. I’m not a seamstress by any means and it sure didn’t turn out as cute as the original but it works for us. Here is the Tutorial

This is our version of the travel pillow.Processed with VSCOcam with a6 preset
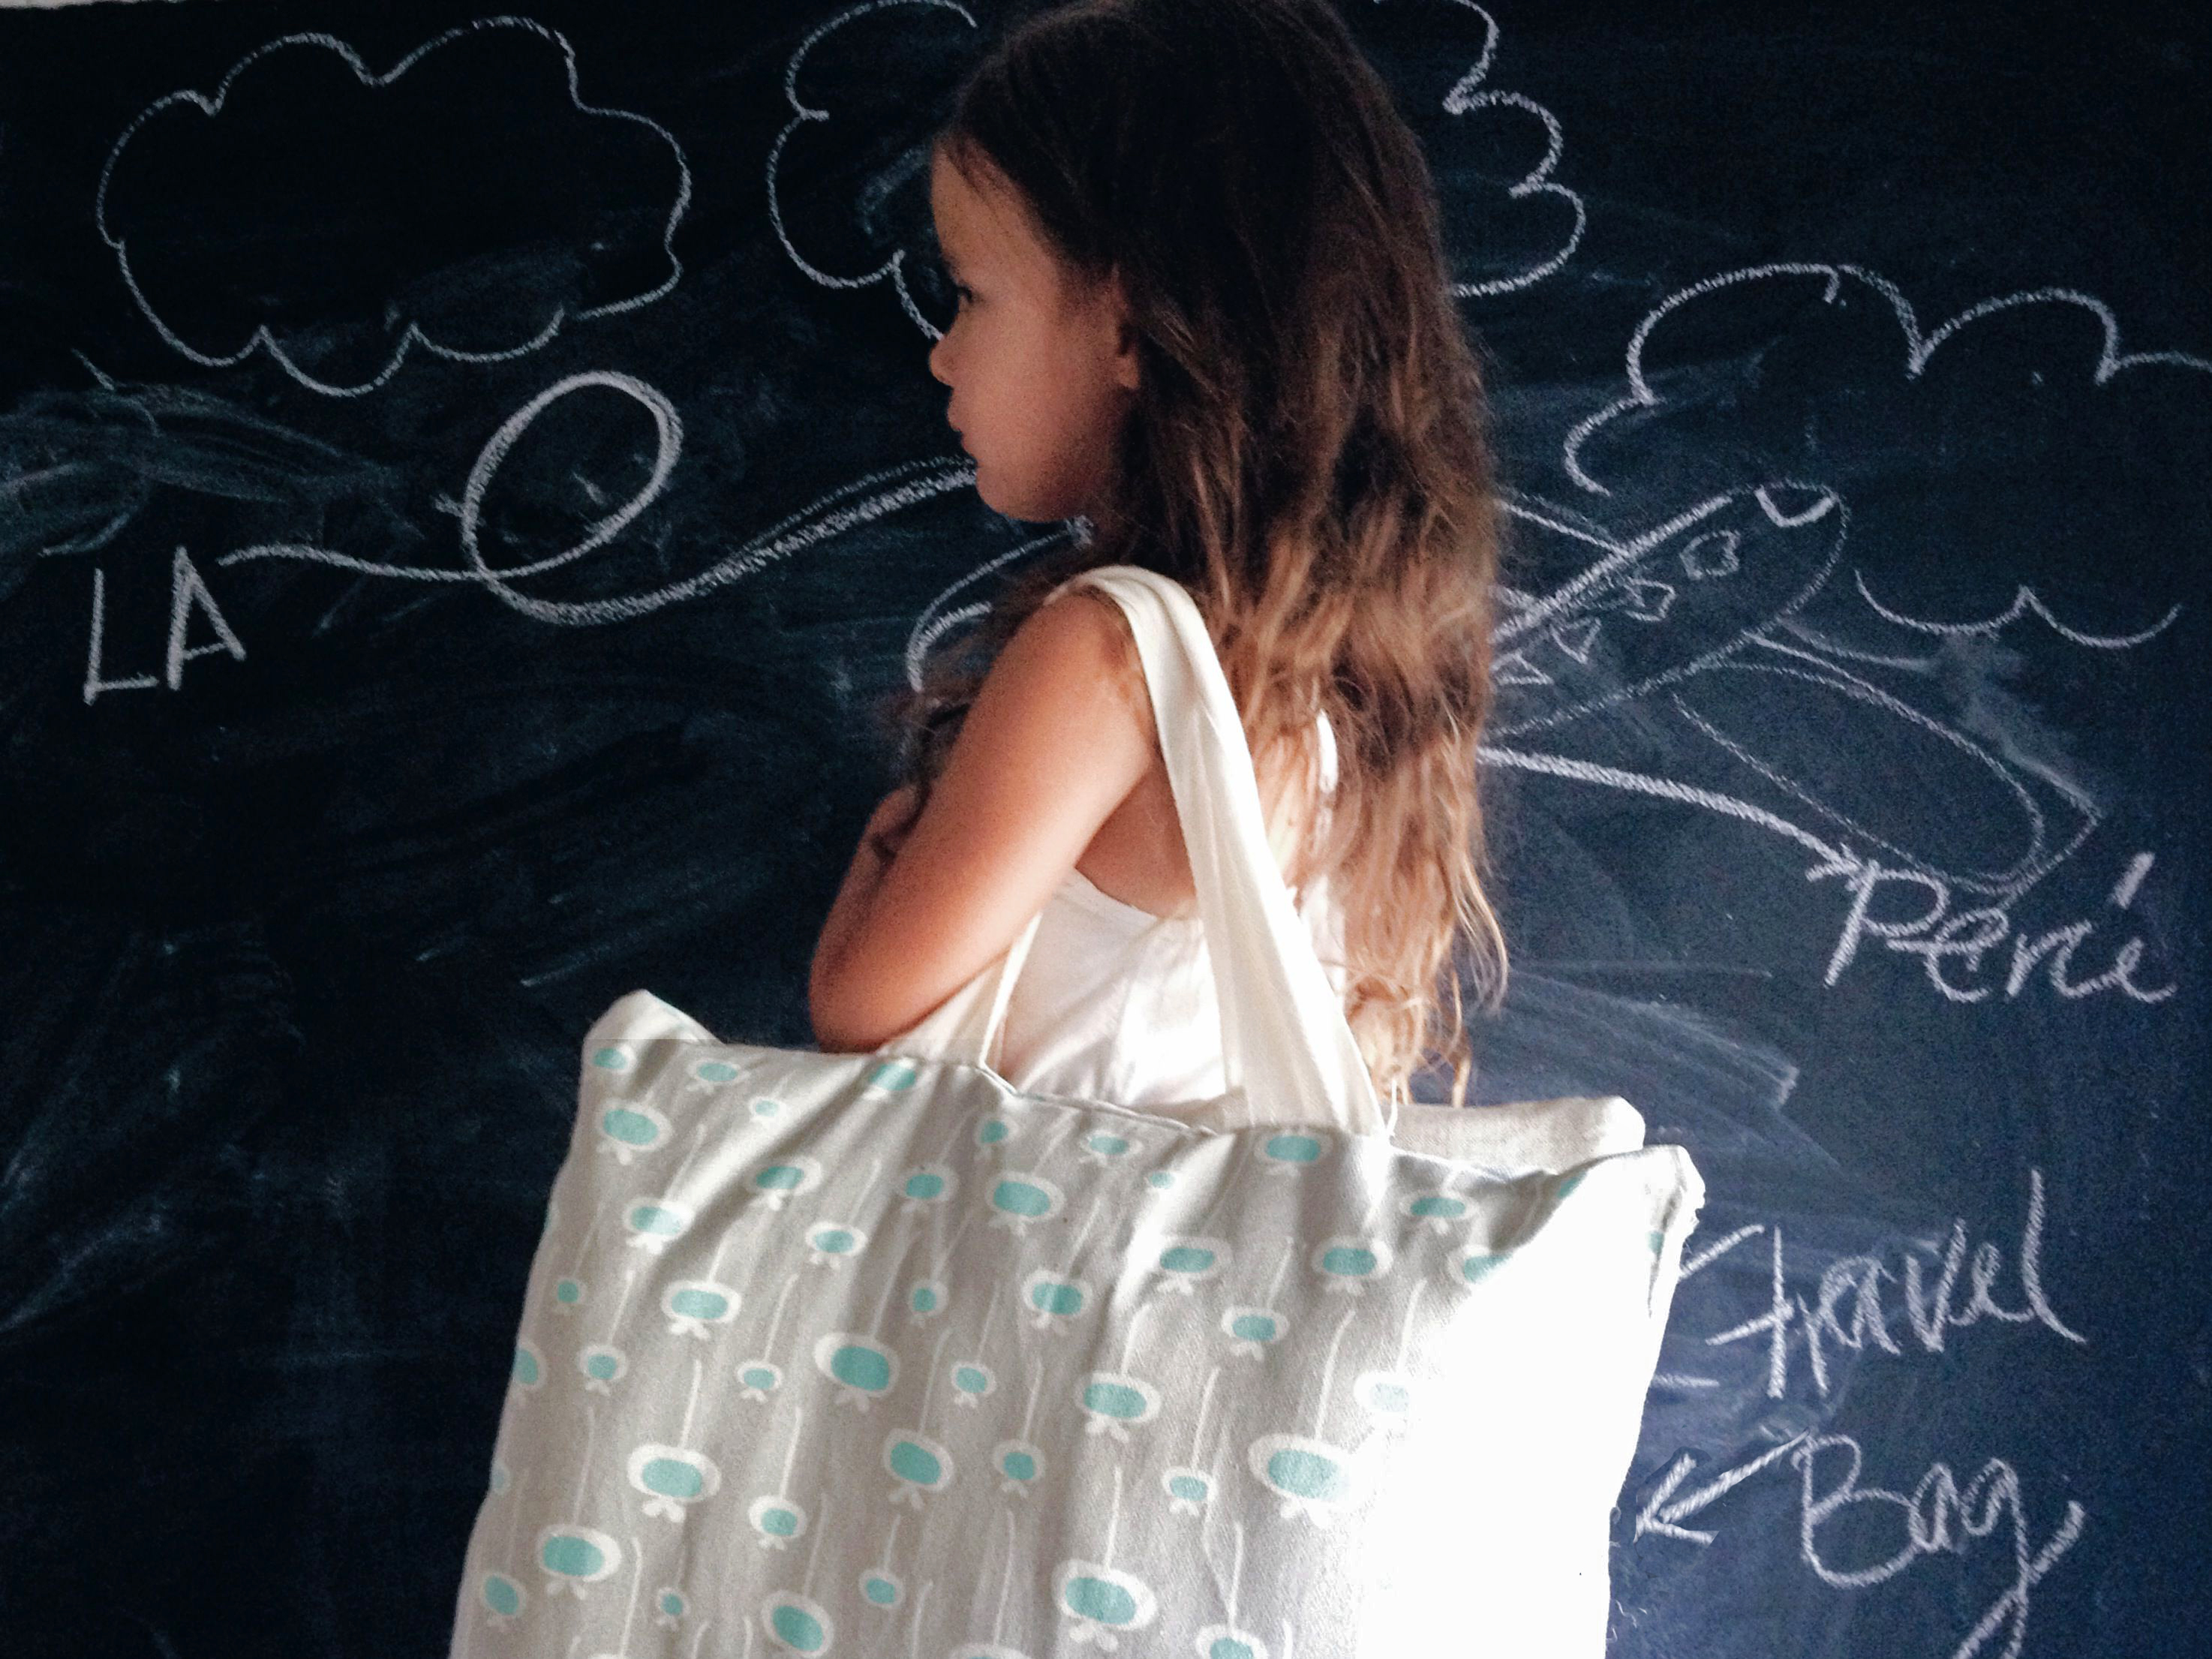
For the handles I used my old wraps from kickboxing. I have’t been back to kickboxing for about 18 months, I’m just glad I got to re-use them.Processed with VSCOcam with a6 preset

Processed with VSCOcam with a6 preset


Come One Come All, “Everly Is Turning One”

When it came to planning Everly’s first bday party I started planning more than 2 months in advance. From invitation, to the cake and most everything was made by us.It sure helps a lot that my husband likes to cook and he is in charge of all the food.Our house is pretty small so we needed to use the front yard and for seating, we used hay. We thought it went with the theme plus it was cheap.

Circus1

My husband Chad made the cupcakes he iced the cupcakes first and then added some mini marshmallows on top so it would look like popcorn buckets.
For the favors, I used tin buckets I found at  Target for $1, some animal masks, clown noses, and made a label for the animal crackers.
Circus2
The entrance we covered with a big top tent. I had striped fabric leftover from a previous party and I thought I could make it into a big top. I bought PVC pipe for the frame and used lots of duct tape and fabric glue.
Circus4
I’ll be posting tutorials and free printables soon .
Tin Buckets / target
Clown Noses / Oriental Trading
Animal Mask / Michael’s
Black & White Stripe Fabric / Ikea

Spelling B

I’ve been looking for ideas to entertain my toddler on the plane and knowing she is really interested in writing and spelling. I think this will be perfect…


Processed with VSCOcam with c2 preset
Things you need:
Cookie sheet, painters tape, Chalkboard spray paint for the cookie sheet, Magnetic letters and spray paint for the letters.

Processed with VSCOcam with a6 preset
1.Tape around the area of the cookie sheet you want to paint . Once that is ready, spray paint with Chalkboard paint. 
You might need to spray paint a couple of times and let it dry.
2. Place the letter facing up and spray paint with your favorite color. After they dry, rotate them and spray them again.
You might need to repeat this a couple of times till the letters are covered with paint.
J&L22
Now let the Spelling Bee begin.


Cookie sheet /Dollar Store
Chalkboard paint /Home Depot
magnetic letters /Toys R US
Spray paint for letters / Home Depot

Jack & Lola Photography

Today I wanted to blog about my friend Lyndsey, owner of “Jack & Lola Photography.” I’m always so impressed by how she can freeze moments in time with her camera. When I was going to Ad School, photography wasn’t my forte, too technical for me… But seeing how beautiful her pictures are… inspire me to try.
Here are some pictures she’s taken of our family.J&L10J&L9

Jack & Lola Photography

Story Time

We go at least once a week to our favorite shop “Blue Windows” in Belmont Shore. Not only do they have the cutest things but the whole store design is inspiring to me and the staff is super friendly. On one of our many walks we saw on their chalk board “story time” and we were in! Once we got there they didn’t disappoint, It was such a cute book, they also had quilts to sit on, snacks with labels, crafts & favors. The favors were Rocks with the characters of the story so the kids could recreate the story while playing! Super cute!Processed with VSCOcam with a5 preset

Processed with VSCOcam with c1 presetThank you Blue Windows!

Peanut Butter and jelly fish BookBlue Windows

Foxy Stilts

foxy stilts2
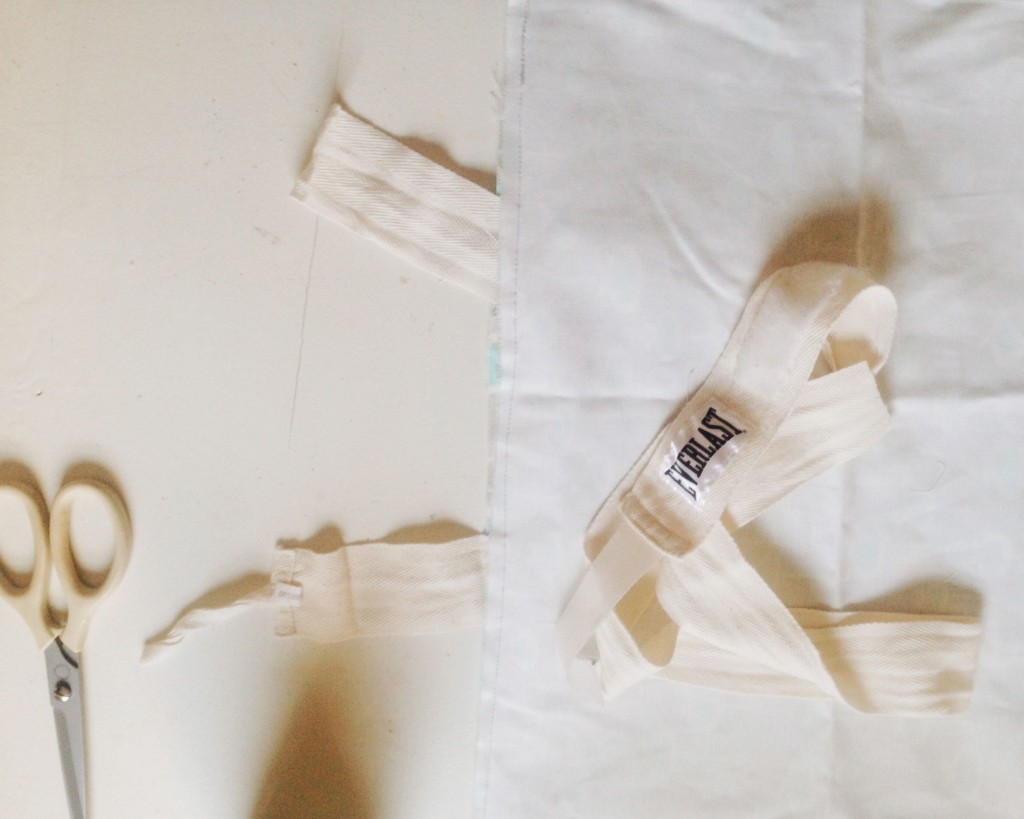
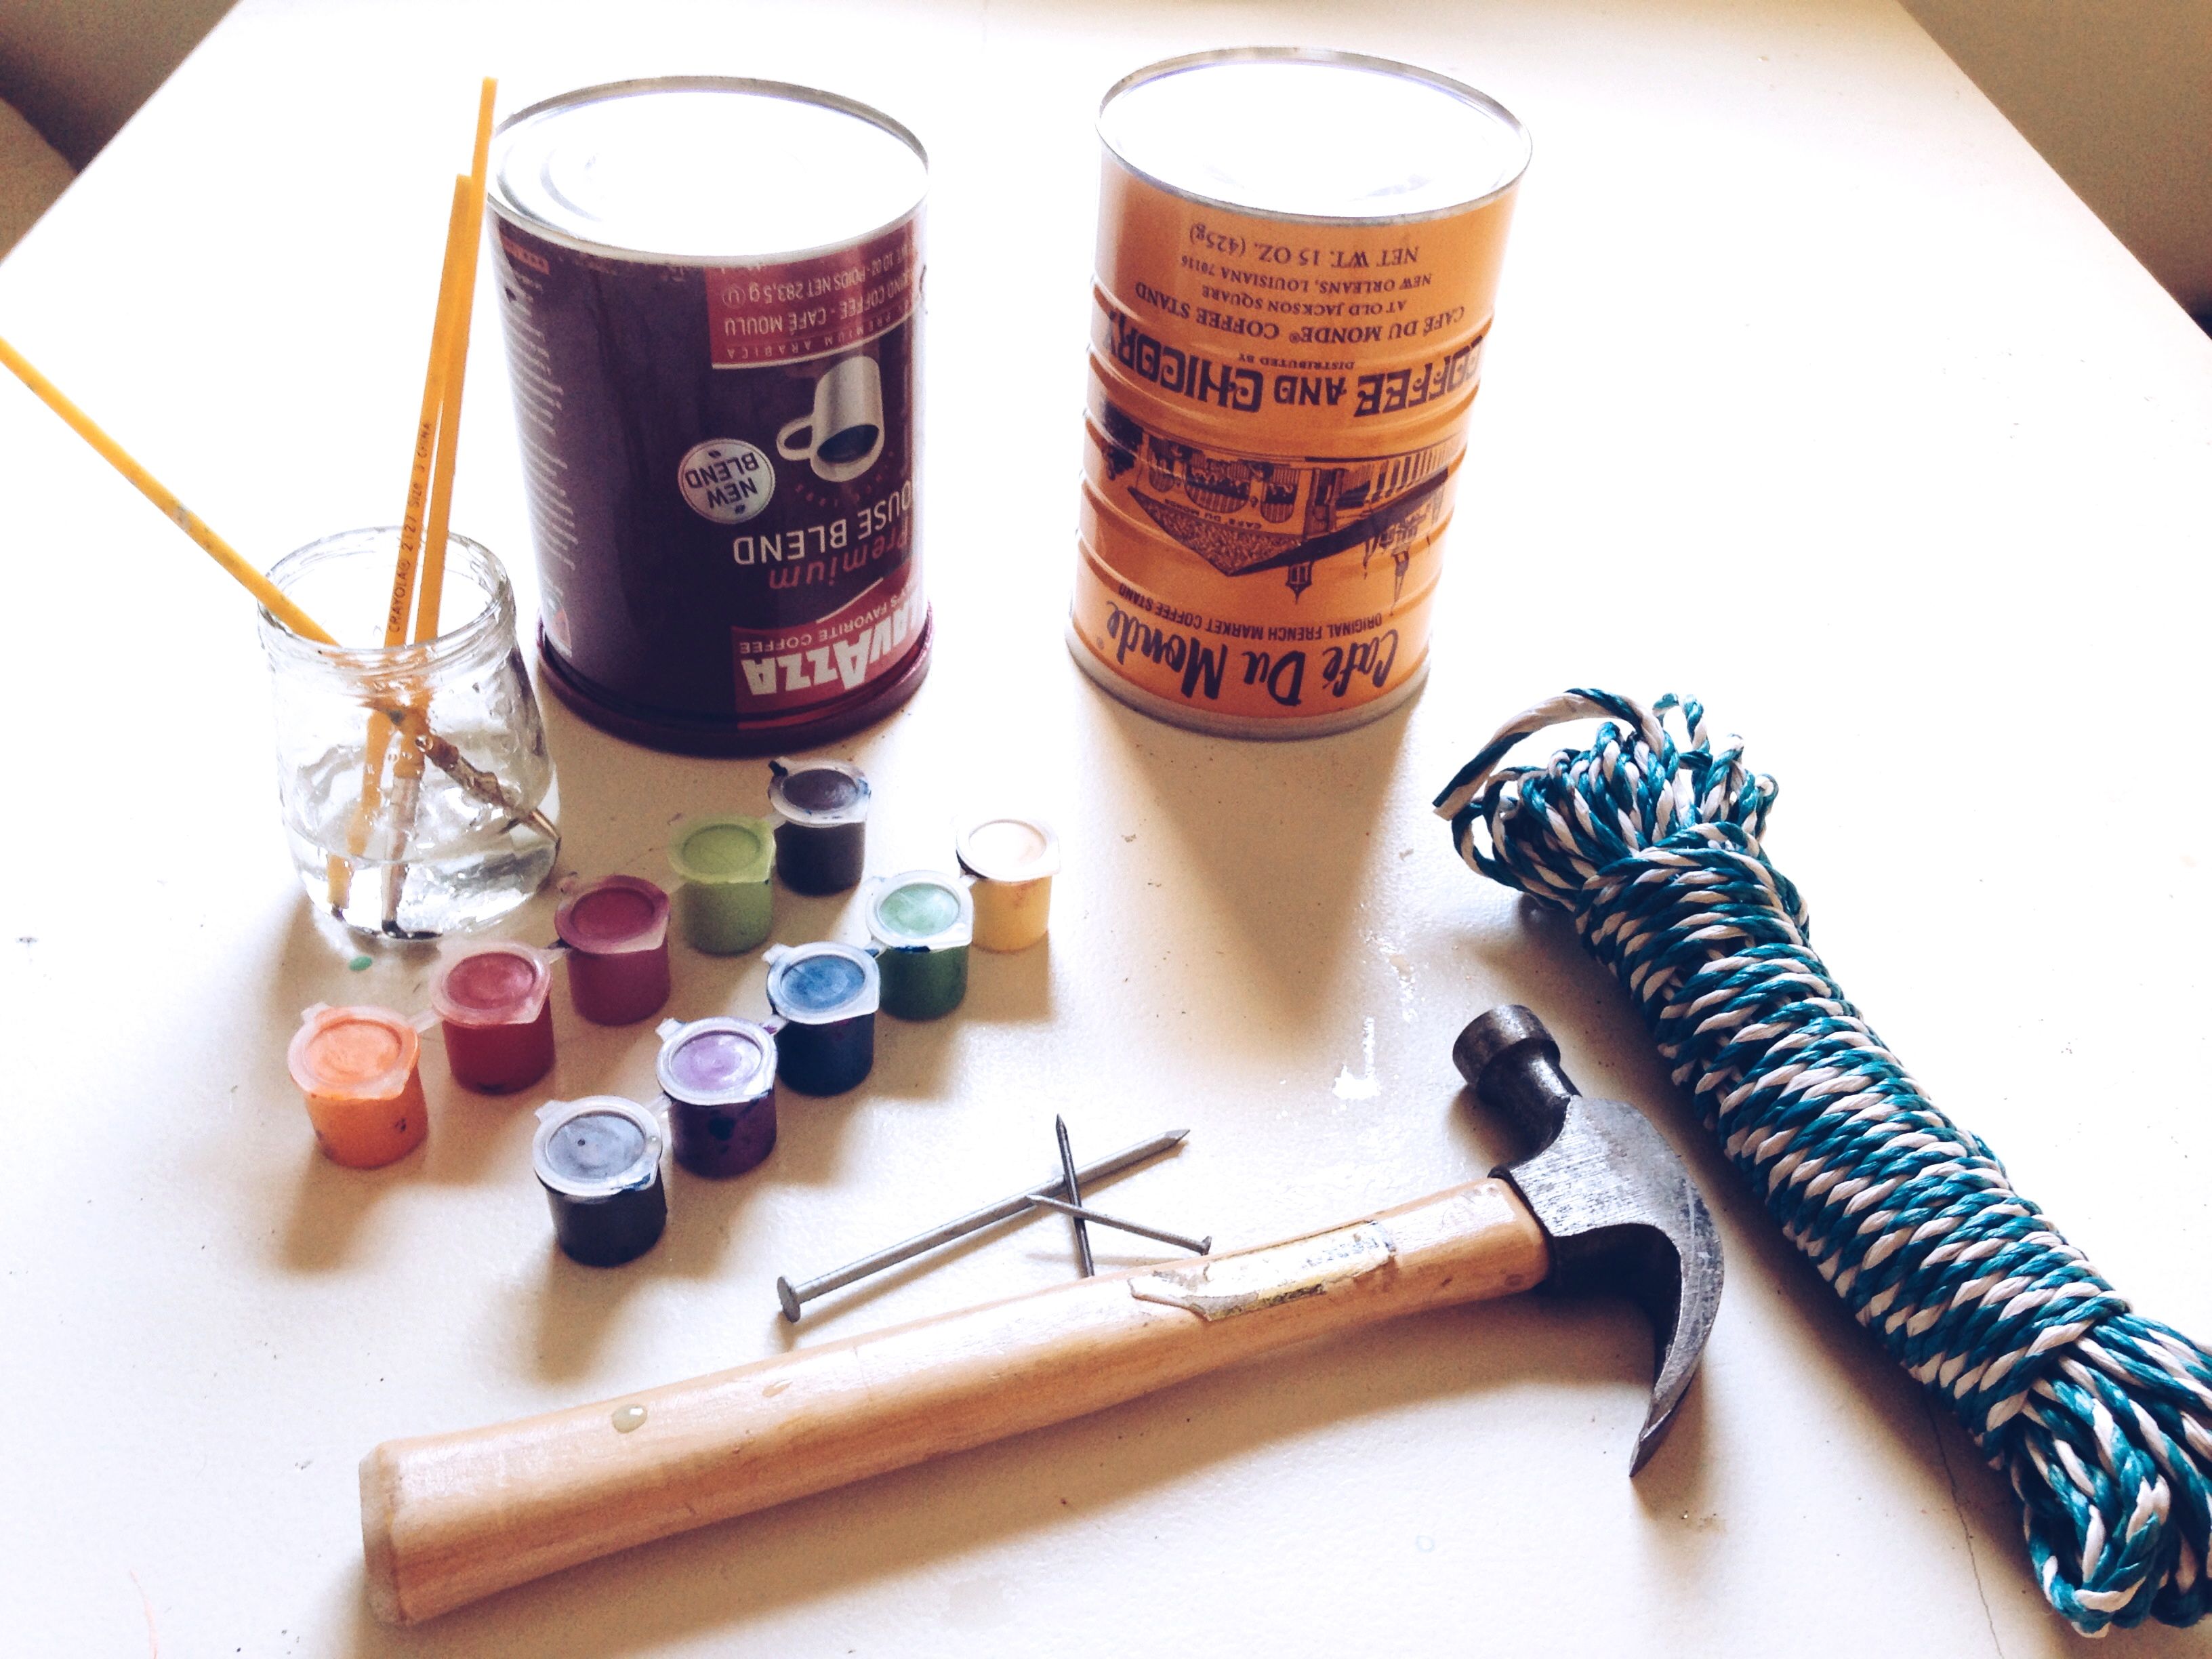
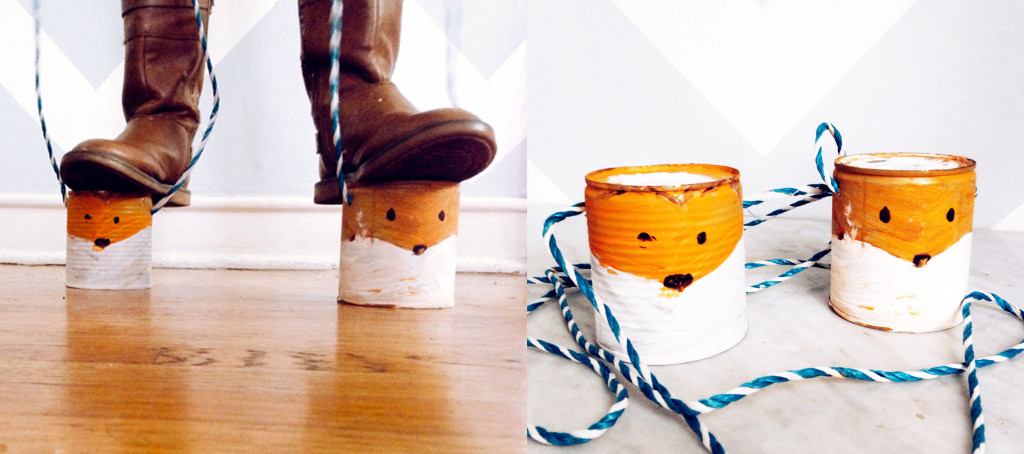
I’m always looking for projects to do with my kids.These Tin-Can Stilts are easy to make with materials you already have at home. Hope you enjoy them as much as my daughter does, the only draw back is they might be a little noisy if they are playing inside the house. Otherwise they are super fun!Processed with VSCOcam with a5 preset

To make make one pair of stilts you need:
2 tin cans
rope, twine or string
paint ( I used paint my daughter already had)
hammer
medium or large nail
1. Remove label from cans. Wash with warm water and dry.
2. Decorate the cans with paint and let it dry.
3. Turn cans over (bottoms side up)
4. Using the hammer and nail, punch two holes in the can.
5. Use twine or string and push it through the holes in your can. Pull string through the inside
of the can and push it out through the other hole. Make sure you make a knot in each end of string.
Now stand on the stilt and pull the string tightly as you walk.
Enjoy


Off To Peru

Trying to pack light with an 8 month old baby and a 4 year old princess, “Not happening”.We have traveled quite a bit with our first kid and I think I have learned to pack smart. My philosophy is “be prepared, just in case” and with that said, I probably over-pack every time… I’m going back home to see my family and friends and this time my husband’s staying behind with our dogs. Little nervous taking this flight by myself with the girls but I think it would be so worth it when I look back.
THINGS TO PACK FOR BABIES


travel